
Wiper and Washer Adjustment (Cont'd)
EL-71prose procedureWiper and Washer Adjustment (Cont'd)
| Specification | Value |
|---|---|
| *13.66 in | 93mm (in) |
| *23.35 in | 85mm (in) |
| *31.50 in | 38mm (in) |
| *40.98 in | 25mm (in) |
*13.66 in
93mm (in)
*23.35 in
85mm (in)
*31.50 in
38mm (in)
*40.98 in
25mm (in)
Before reinstalling wiper arm, clean up the pivot area as illustrated. This will reduce possibility of wiper arm looseness.
Washer Nozzle Adjustment
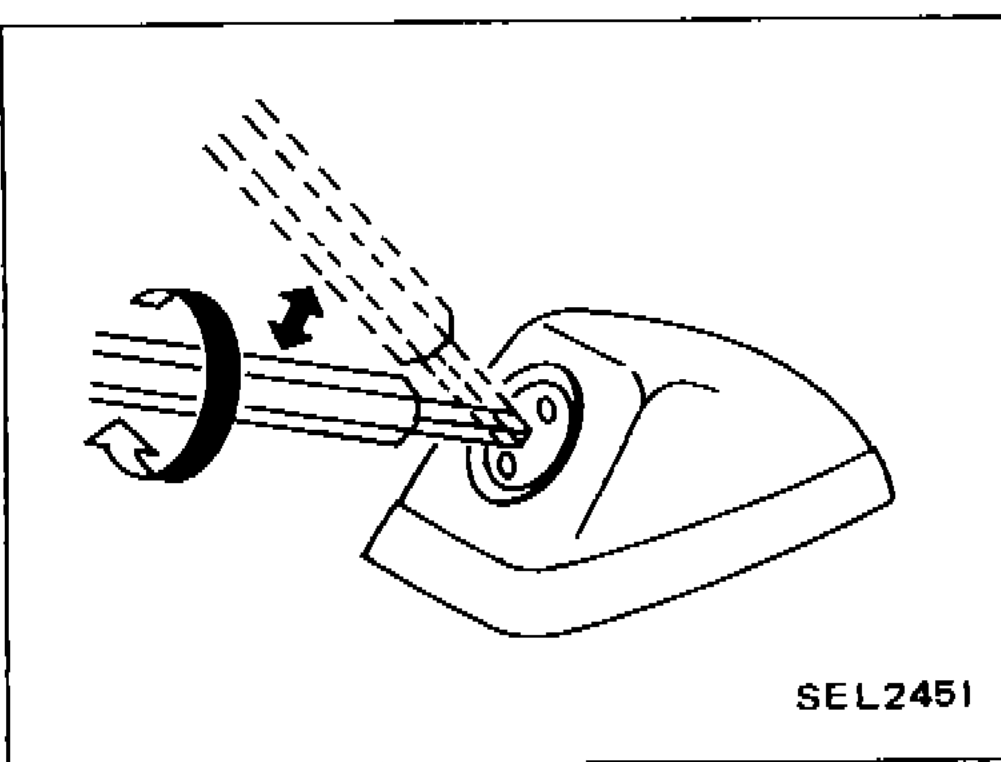
- 1Adjust washer nozzle with suitable tool as shown in the figure at left. Details of tool are shown below.
 SEL2451
| Specification | Value |
|---|---|
| Adjusting hole sizeL type wrench adjusting hole | 0.9 (0.035) x 1.0 (0.039)mm (in) |
| L type wrench tip widthwidth | 1.5 (0.059)mm (in) |
| L type wrench tip heightheight | 1.5 (0.059)mm (in) |
| L type wrench shank widthwidth | 0.85 (0.0335)mm (in) |
| L type wrench shank heightheight | 0.85 (0.0335)mm (in) |
Adjusting hole sizeL type wrench adjusting hole
0.9 (0.035) x 1.0 (0.039)mm (in)
L type wrench tip widthwidth
1.5 (0.059)mm (in)
L type wrench tip heightheight
1.5 (0.059)mm (in)
L type wrench shank widthwidth
0.85 (0.0335)mm (in)
L type wrench shank heightheight
0.85 (0.0335)mm (in)
Wiper Amplifier Check
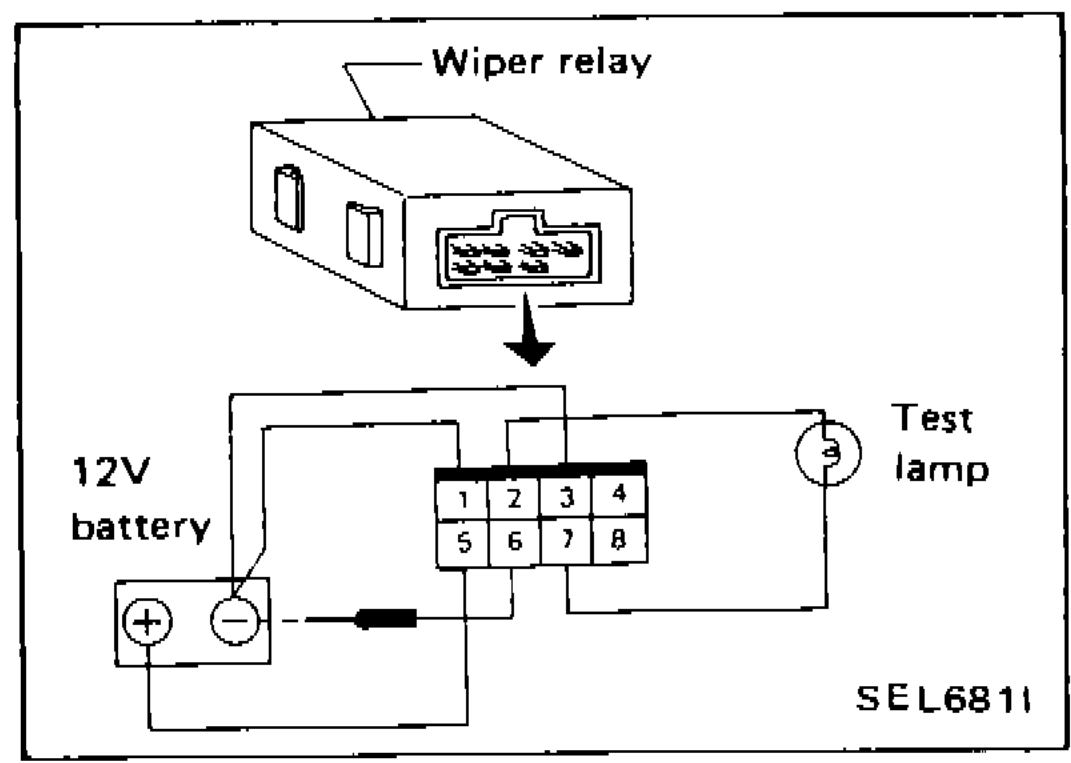
- 1Connect as shown in the figure at left.
 SEL6811
 - 2If test lamp comes on when connected to terminal 6 and battery ground, wiper relay is normal.