
Engine Cooling System — Radiator (Aluminum type)(Cont'd)
LC-13prose procedureA/T model only: attach hose to oil cooler as well when performing pressure test
Radiator (Aluminum type)(Cont'd)
Radiator (Aluminum type) Assembly (Continued)
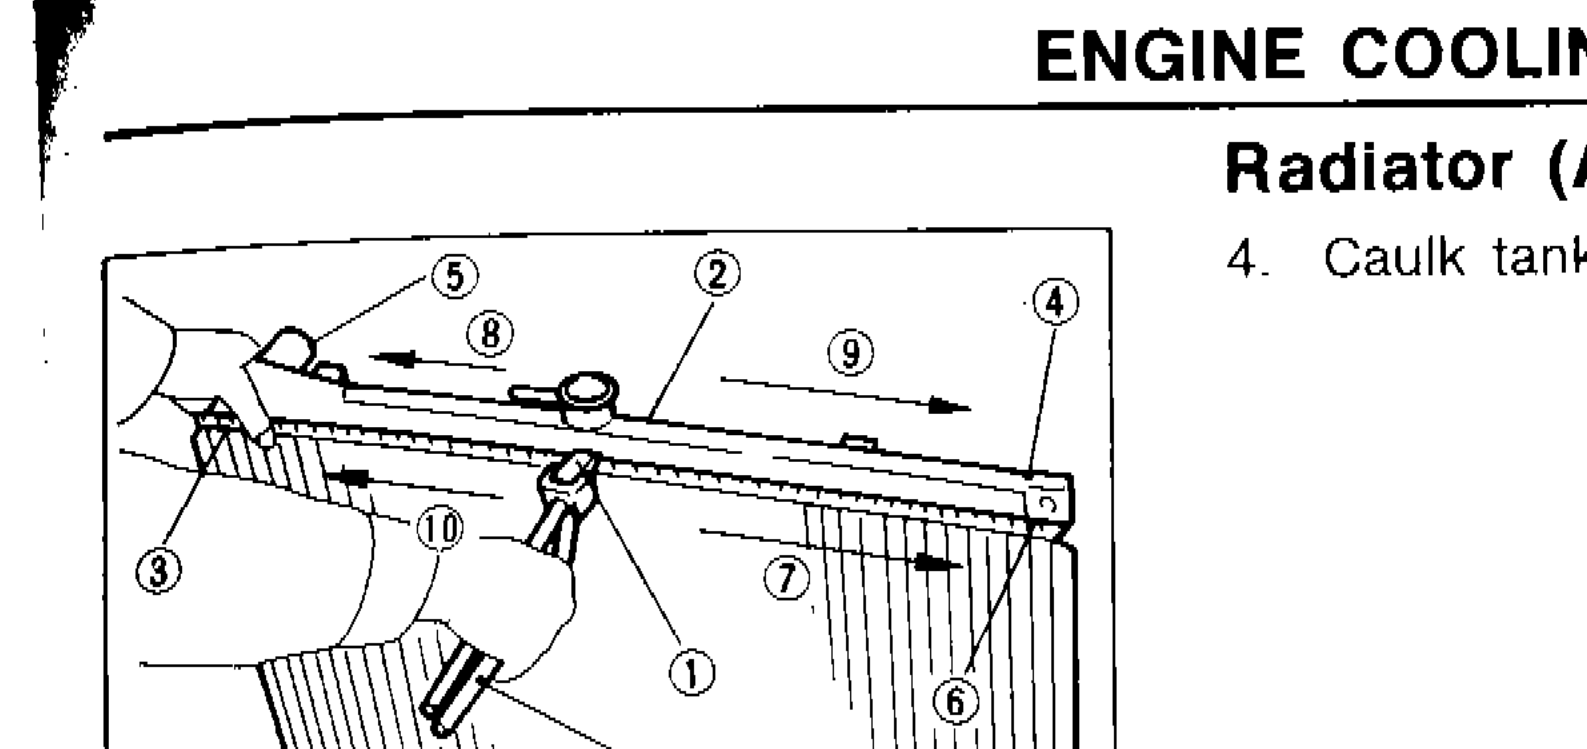
- 4Caulk tank in specified sequence with Tool.Keep tool perpendicular to the radiator (90°).Use pliers in the locations where Tool cannot be used.
 SLC904
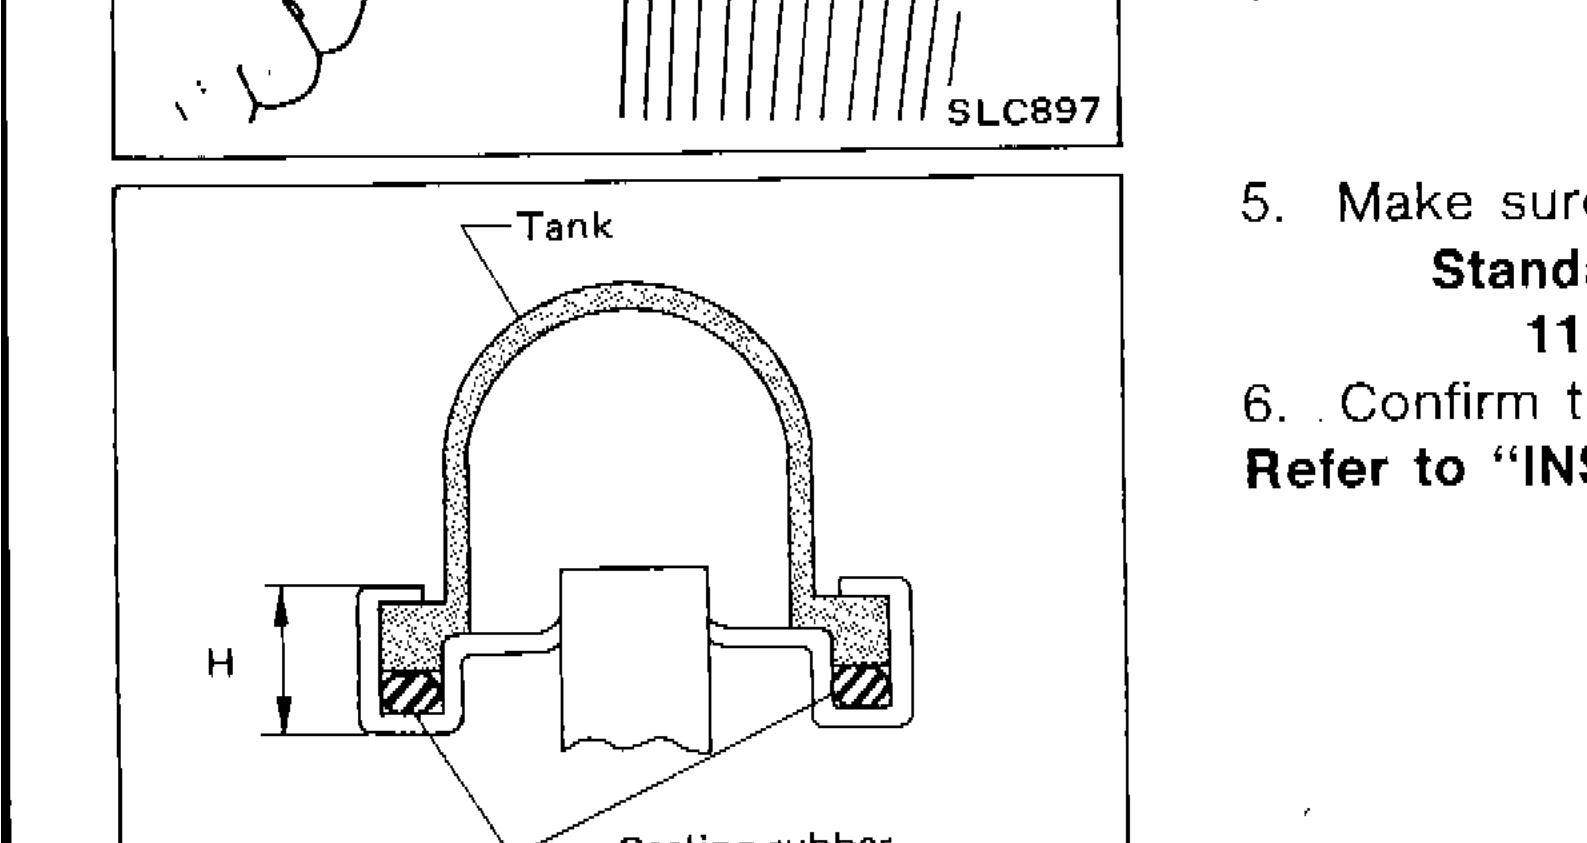
 - 5Make sure that the rim is completely crimped down. Standard height "H": 11.5 mm (0.453 in)
 SLC898
 - 6Confirm that there is no leakage. Refer to "INSPECTION".
| Specification | Value |
|---|---|
| Standard height "H" (rim crimped)Rim completely crimped down | 11.5mm (0.453 in) |
Standard height "H" (rim crimped)Rim completely crimped down
11.5mm (0.453 in)
INSPECTION
Radiator Inspection
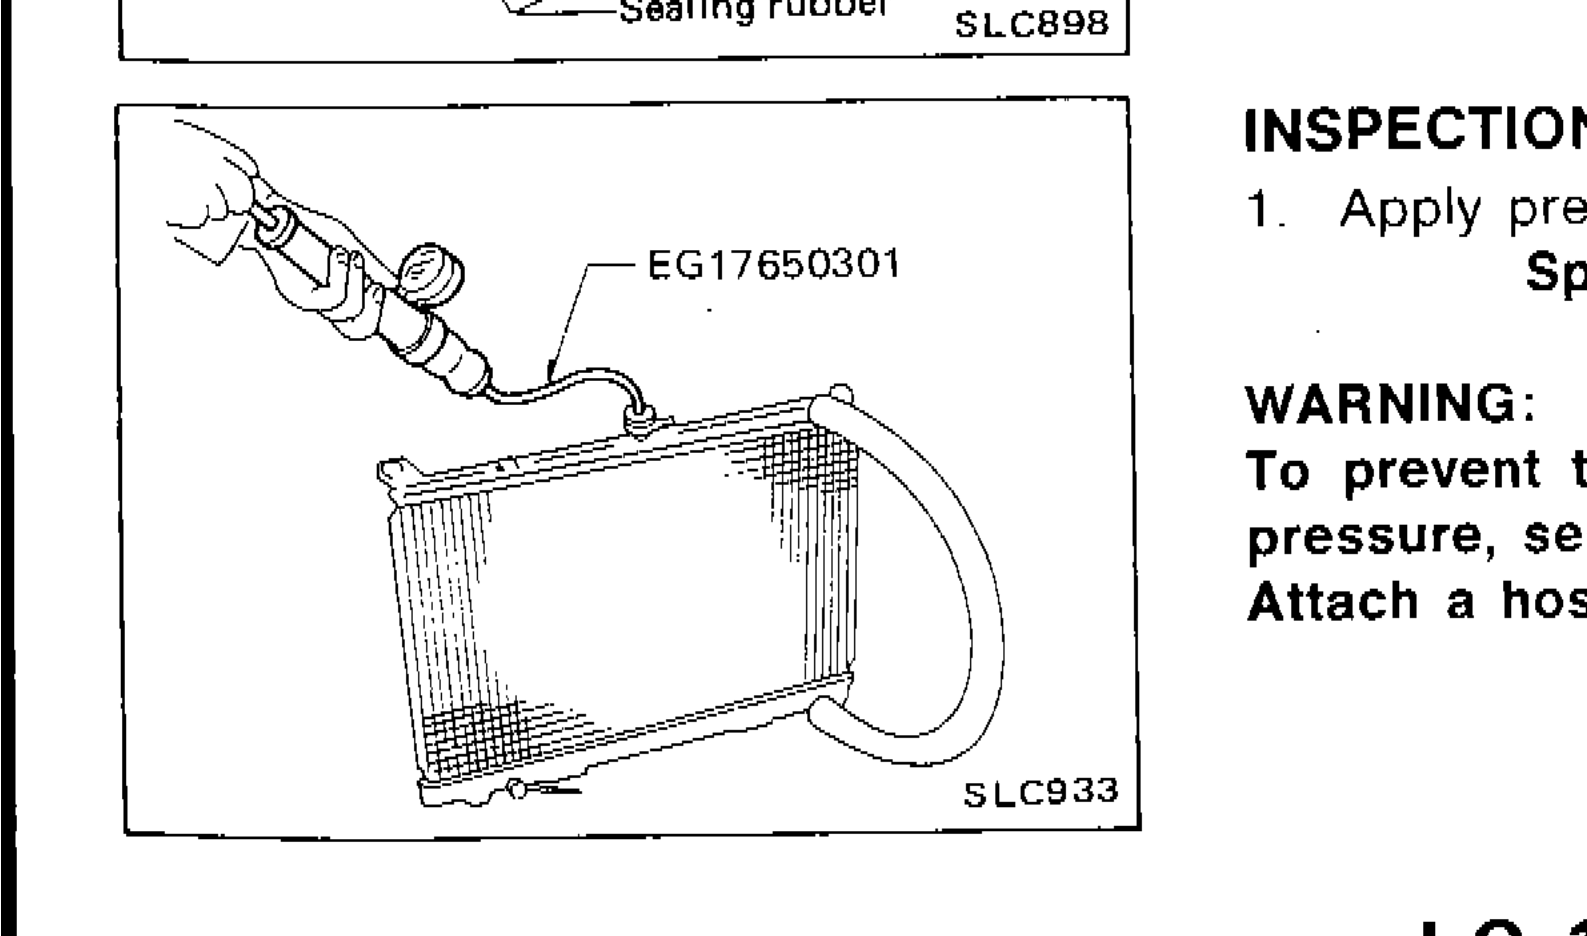
- 1Apply pressure with Tool. Specified pressure value: 157 kPa (1.57 bar, 1.6 kg/cm², 23 psi)To prevent the risk of the hose coming undone while under pressure, securely fasten it down with a hose clamp. Attach a hose to the oil cooler as well. (A/T model only)
 SLC933
| Specification | Value |
|---|---|
| Specified pressure value (inspection)Radiator leak test | 157 kPa (1.57 bar, 1.6 kg/cm², 23 psi)kPa / bar / kg/cm² / psi |
Specified pressure value (inspection)Radiator leak test
157 kPa (1.57 bar, 1.6 kg/cm², 23 psi)kPa / bar / kg/cm² / psi
WARNING
To prevent the risk of the hose coming undone while under pressure, securely fasten it down with a hose clamp. Attach a hose to the oil cooler as well. (A/T model only)
See also
INSPECTION