
HOW TO READ WIRING DIAGRAMS
GI-9prose procedureSUPER MULTIPLE JUNCTION (S.M.J.)
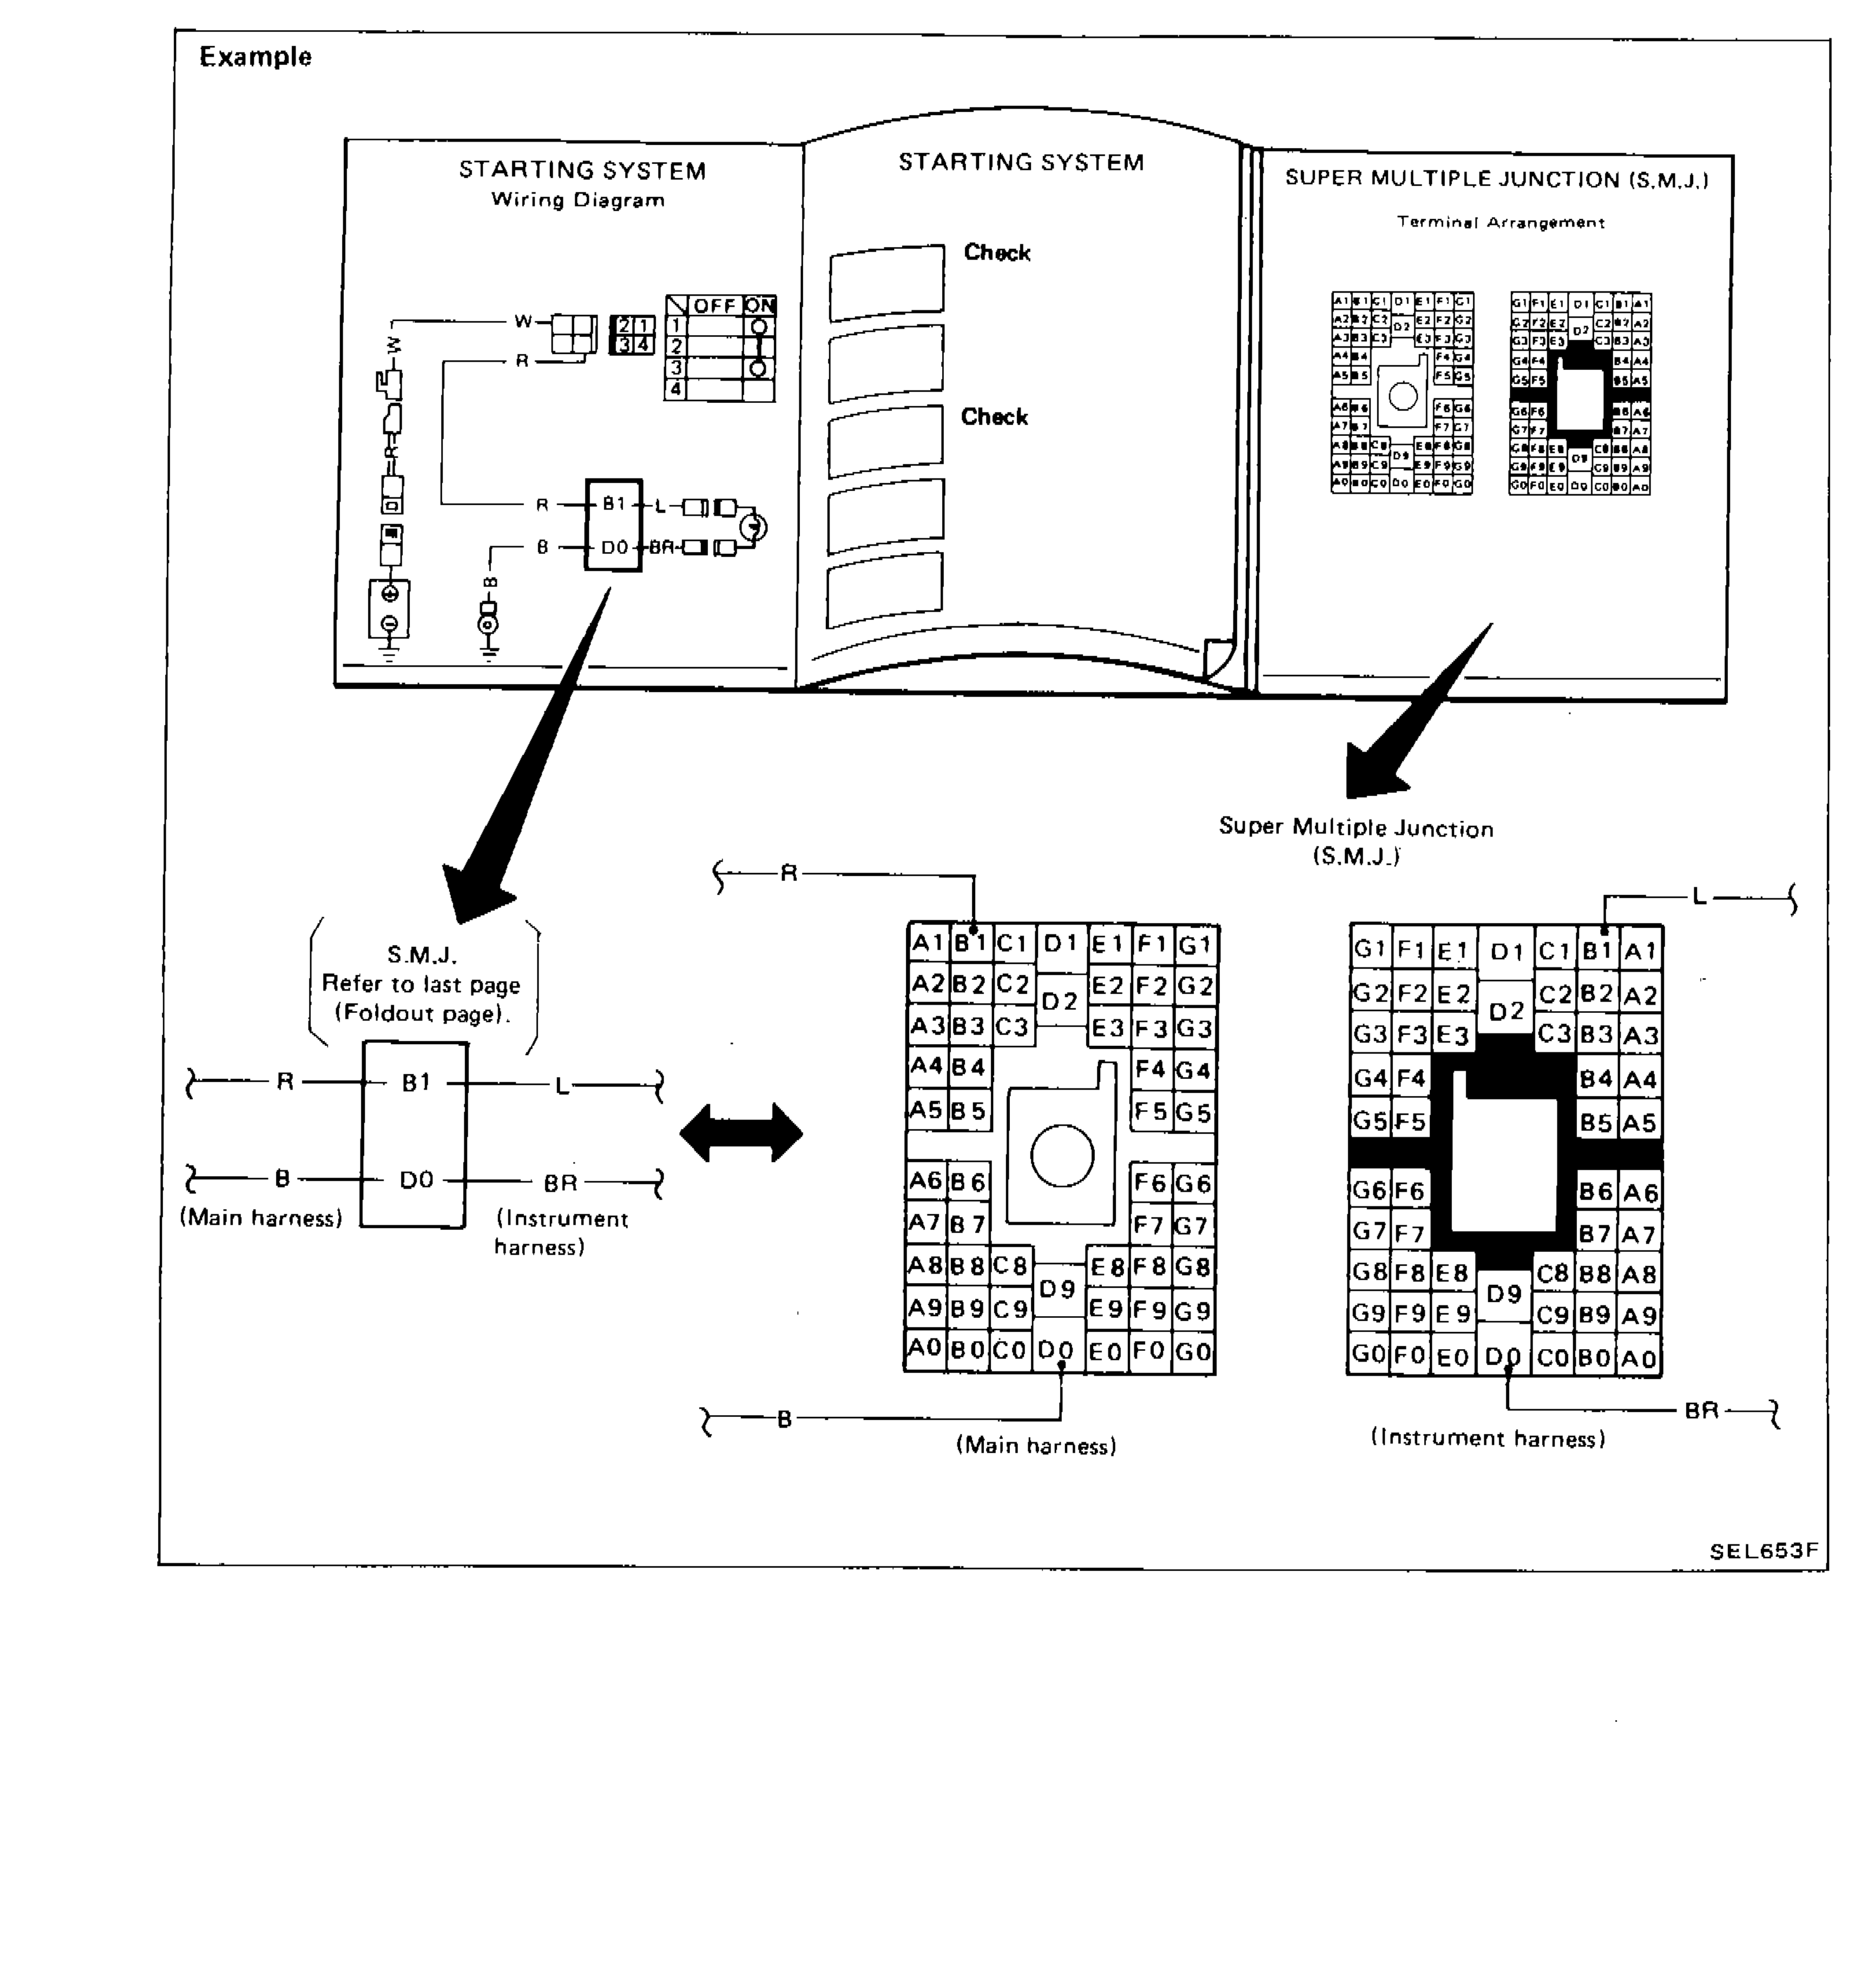
The "S.M.J." indicated in wiring diagrams is shown in a simplified form. The terminal arrangement should therefore be referred to in the foldout at the end of the Service Manual.
The foldout should be spread to read the entire wiring diagram.
Component LocationFig. fig1
Example diagram showing the S.M.J. simplified representation in wiring diagrams and its correspondence to the actual terminal arrangement foldout. The simplified wiring diagram shows connections via wires R, B, L, BR between main harness connectors B1 and D0 and the instrument harness. The full S.M.J. terminal grid shows terminals arranged in rows A through G and columns 0 through 9, with two connector blocks representing the main harness side and instrument harness side.
SEL653F
1STARTING SYSTEM Wiring Diagram(top-left of example box)
2STARTING SYSTEM (foldout page with Check indicators)(top-center of example box)
3SUPER MULTIPLE JUNCTION (S.M.J.) Terminal Arrangement(top-right of example box)
4Super Multiple Junction (S.M.J.)(right-center of example box)
5S.M.J. Refer to last page (Foldout page).(left-center of example box)
6R(wire label top-center)
7L(wire label top-right)
8B1(connector block center-left)
9D0(connector block center-left lower)
10BR(wire label center-right)
11B(wire label bottom-center)
12(Main harness)(bottom-left of connector block)
13(Instrument harness)(bottom-right of connector block)
14A1 B1 C1 D1 E1 F1 G1(S.M.J. grid row 1 left block)
15A2 B2 C2 D2 E2 F2 G2(S.M.J. grid row 2 left block)
16A3 B3 C3 E3 F3 G3(S.M.J. grid row 3 left block)
17A4 B4 F4 G4(S.M.J. grid row 4 left block)
18A5 B5 F5 G5(S.M.J. grid row 5 left block)
19A6 B6 F6 G6(S.M.J. grid row 6 left block)
20A7 B7 F7 G7(S.M.J. grid row 7 left block)
21A8 B8 C8 D9 E8 F8 G8(S.M.J. grid row 8 left block)
22A9 B9 C9 E9 F9 G9(S.M.J. grid row 9 left block)
23A0 B0 C0 D0 E0 F0 G0(S.M.J. grid row 0 left block)
24G1 F1 E1 D1 C1 B1 A1(S.M.J. grid row 1 right block)
25G2 F2 E2 D2 C2 B2 A2(S.M.J. grid row 2 right block)
26G3 F3 E3 C3 B3 A3(S.M.J. grid row 3 right block)
27G4 F4 B4 A4(S.M.J. grid row 4 right block)
28G5 F5 B5 A5(S.M.J. grid row 5 right block)
29G6 F6 B6 A6(S.M.J. grid row 6 right block)
30G7 F7 B7 A7(S.M.J. grid row 7 right block)
31G8 F8 E8 D9 C8 B8 A8(S.M.J. grid row 8 right block)
32G9 F9 E9 C9 B9 A9(S.M.J. grid row 9 right block)
33G0 F0 E0 D0 C0 B0 A0(S.M.J. grid row 0 right block)
See also
foldout at end of Service Manual